INTRODUCTION:
This tutorial is intend to help Flight Simulator X owners modify aircraft designed for Flight Simulator 2004 to make them compatible for Flight Simulator X. The modifications here are relatively simple but do the job required and makes the plane flyable in Flight Simulator X. More advanced modifications such as removing model holes or changing the structure or dynamics of the aircraft require the modelling software or an advanced knowledge of the FSX programming and I would highly recommend that you follow that software’s unique instructions if you must make these modifications, though I find that most FS2004 aircraft are adequate for use already. Unfortunately, there is no way that I know of the implement a Virtual Cockpit into a FS2004 aircraft easily so this tutorial will not cover that. The most important thing to remember when doing modification work is to ALWAYS CREATE BACKUP COPIES IN SEPERATE LOCATIONS of all files you are changing no matter how unimportant they may seem. I cannot emphasise how important this is. If anything was to go wrong during the modifications, this is your ONLY safety copy so that you do not have to reinstall Flight Simulator or the Aircraft. Finally, most aircraft for FS2004 are not DX10 compatible so this must be turned off for the aircraft to work.
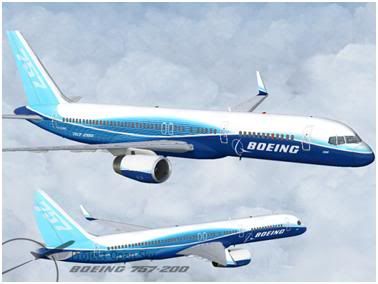
For this tutorial I am going to use the fantastic Project Opensky Boeing 757-200 with the Boeing Worldliner livery. This freeware model is owned by Project Opensky and its use in this tutorial is as an example. No aircraft produced using this tutorial are to be uploaded to any site without the permission of the creator of the original aircraft. I stress that this tutorial is for YOUR OWN USE ALONE to improve your FSX experience.
DOWNLOADING:
Create a temporary folder on your hard disk (such as C:\Temp\Modifications) where you will perform the modifications.
Download and move the plane into the temporary folder on your hard disk. At the same time download a JPEG image of the aircraft to act as a thumbnail and move it into the modification folder as well. This will not be needed in the tutorial as images come with almost all Project Opensky models and liveries but it may be needed in other aircraft so I would recommend downloading an image just in case you need it. The creation of this modification folder will make it easier to work on the plane and should prevent any risk of damage to any other aircraft in your Flight Simulator X folder.
LAYOUT OF AIRCRAFT FILES:
Once the aircraft is in the folder unzip the file and open it to see the following files:
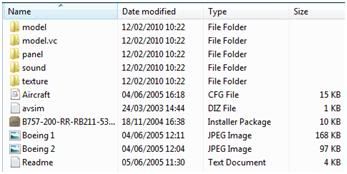
The folders that you are going to be editing are Panel, Sound and Texture as well as the Aircraft.cfg file. In this tutorial I am just going to use default FSX sounds and panels but if you want a more accurate and enjoyable experience you can search Flightsim.com or AVSIM for a FSX compatible panel and soundset for the specific aircraft that you are modifying.
The other parts can be found here:
Part Two
Part Three
Part Four
No comments:
Post a Comment